Ejento AI
Guides
QuickstartRecipesREST APIsRelease NotesFAQs
Guides
QuickstartRecipesREST APIsRelease NotesFAQs
Ejento AI
  1. Guides
  • Basic Operations
    • Features
      • Organization → Projects → Assistants → Teams Hierarchy
    • Guides
      • Login/Signup
  • Assistants
    • Overview
    • Features
      • Assistant Access Control
      • Caching Responses for Assistants
      • Assistant Evaluation
      • Evaluation Metrics
      • URL-based Chat Thread Creation and Prepopulation
      • Reasoning Patterns
      • Staging & Publishing
    • Guides
      • Add Assistant
      • Evaluate Assistant
      • Edit Assistant
      • Assistant Edit Access
      • Embed Assistant
      • Delete Assistant
      • Add Favourite Assistants
      • View Assistant Id
      • View Dataset Id
      • Voice Calling with Assistants
  • Corpus
    • Overview
    • Features
      • Corpus Permissions
      • PII Redaction
      • ETag Setup for Corpus Incremental Refresh
    • Guides
      • Assistant Corpus Setup
      • Assistant Corpus Settings
      • Corpus Access Control
      • Corpus Connections
      • View Corpus Id
      • View Document Id
      • Tagging
        • Corpus tagging
        • Document tagging
  • Teams
    • Overview
    • Guides
      • Add a Team
      • Edit a Team
      • Delete a Team
      • View Team Id
  • Projects
    • Overview
    • Guides
      • Add a Project
      • Edit a Project
      • Managing Assistants in a Project
      • Delete a Project
      • View Project Id
  • User Settings
    • Overview
    • Features
      • Ejento AI User Access Levels
    • Guides
      • Add new user
      • Invite Users via Link or Email
      • View my User Id
  • API Keys
    • Overview
    • Guides
      • How to generate API Key and Auth Token
  • Workflows
    • Overview
    • Features
      • Workflow Access Control
    • Guides
      • Add Workflow
      • Workflow Chat
      • Workflow Edit Access
  • Tools
    • Overview
    • Guides
      • Tools Overview
      • Create External Tool
      • Connect Tool to Assistant
  • Analytics
    • Overview
    • Guides
      • Analyzing Data in the Analytics Dashboard
  • Chatlogs
    • Overview
    • Guides
      • Managing Chatlogs
      • View Chatlog & Chat thread Id
  • Integrations
    • Overview
    • Guides
      • Email Indexing
      • Microsoft Teams
      • Sharepoint Indexing
      • Google Drive Connector
      • MS Teams Integration Setup
      • Creating a Connection in Credential Manager
      • Slack App
      • Discord Bot
  • Ejento AI Shield
    • Overview
    • Features
      • Understanding Guardrails
    • Guides
      • How to enable Guardrails
  • Assistant Security
    • Overview
    • Features
      • Assistant Red Teaming
    • Guides
      • Red Team an Assistant
  • Permission Sets
    • Overview
    • Guides
      • Add Permission Set
  • Usage
    • Overview
    • Guides
      • Set Spend Limits
  1. Guides

Set Spend Limits

This guide walks through setting your organization's monthly budget, giving users their own limits, and choosing what happens when someone reaches one.
Who this is for: Global Admins
Where you'll be working: Organization Settings → Usage → Limits.

Before you begin#

Make sure you have the following ready:
Global Admin access. Only Global Admins can set limits, change what happens at a limit, or decide increase requests.
Real numbers to work from. Spend is measured whether or not a limit is set, so the Overview and Users tabs already hold figures to base a budget on. Read them before you pick an amount. Limits take effect immediately and can be changed at any time, so a first pass does not have to be perfect.
Three figures decided before you start typing:
The organization's total for the month
The baseline a typical user should get
The exceptions few people who need more or less than that baseline

1. Open Usage & spend#

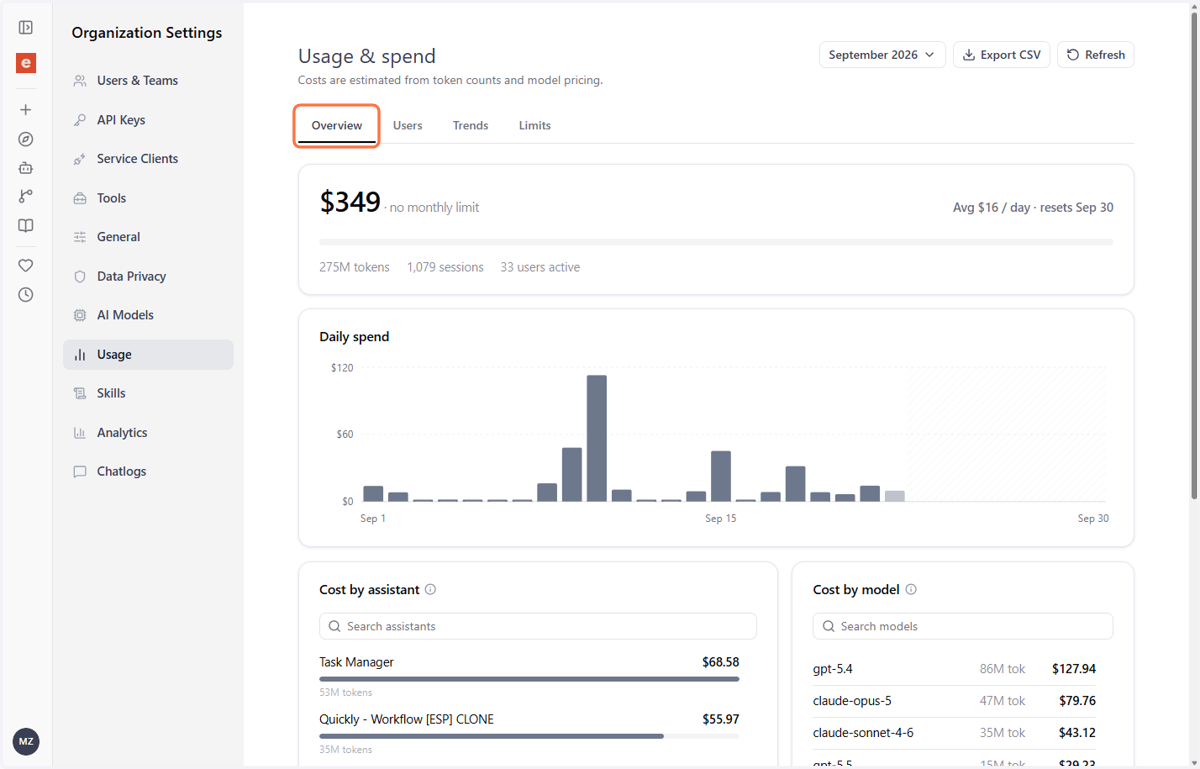
Go to Organization Settings → Usage. The page opens on Overview, the organization's month at a glance.
Click on Overview
The header carries three controls: the month picker, Export CSV, and Refresh. Check the month before reading any figure, limits you set apply from now on, but the spend on screen is for whichever month is selected.
The headline card shows spend against the limit; here $349 · no monthly limit, because no limit has been set yet; with the daily average, the reset date, and totals for tokens, sessions and users active.
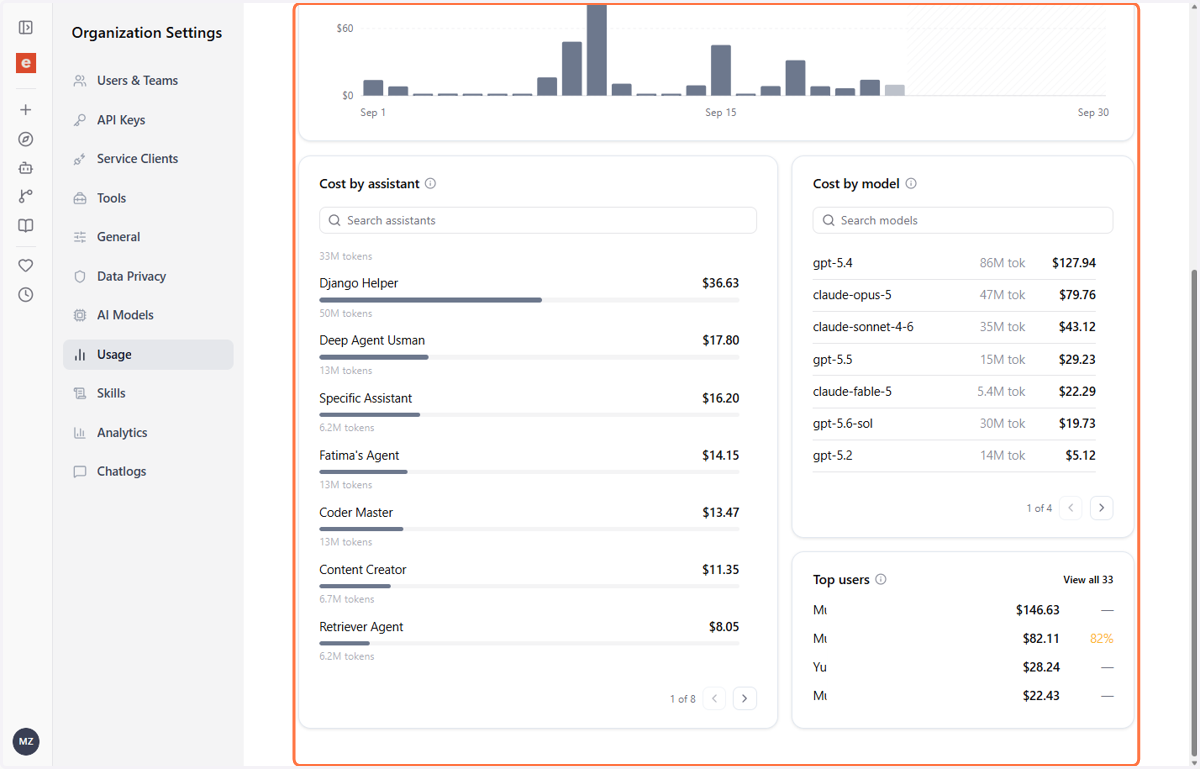
Scroll for the rest of the cards:
Click on overview panel
CardWhat it shows
Daily spendOne bar per day, so a spike is obvious at a glance.
Cost by assistantWhich assistants the money went to, ranked, with each one's token count.
Cost by modelWhich underlying models the spend is made of, with tokens and cost.
Top usersThe biggest spenders, with View all through to the Users tab.

2. Open the Limits tab#

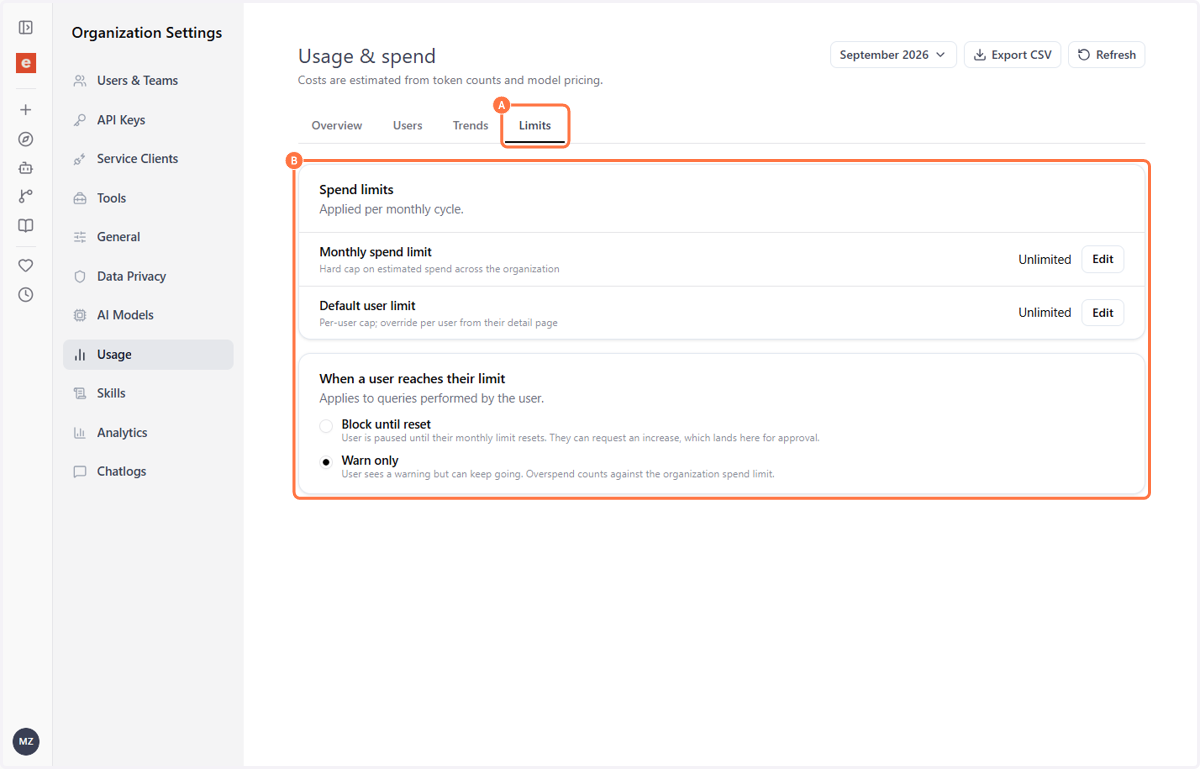
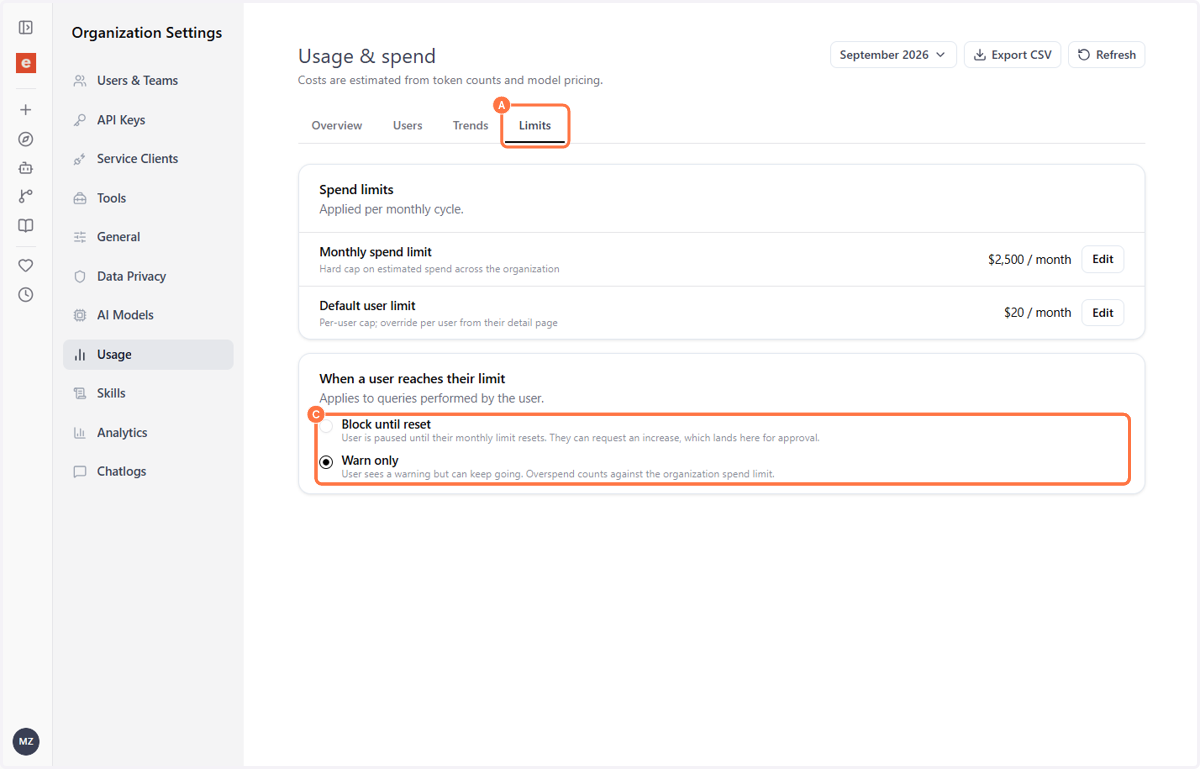
Select Limits. Everything in this guide except the per-user override is set on this tab.
A. Click on Limits B. Click on Limits
The tab holds two cards:
CardWhat it sets
Spend limitsThe Monthly spend limit for the organization, and the Default user limit.
When a user reaches their limitWhether reaching a personal limit pauses the user or only warns them.
A third card, Limit increase requests, appears above these when somebody has asked for more, see step 8.

3. Set the monthly spend limit#

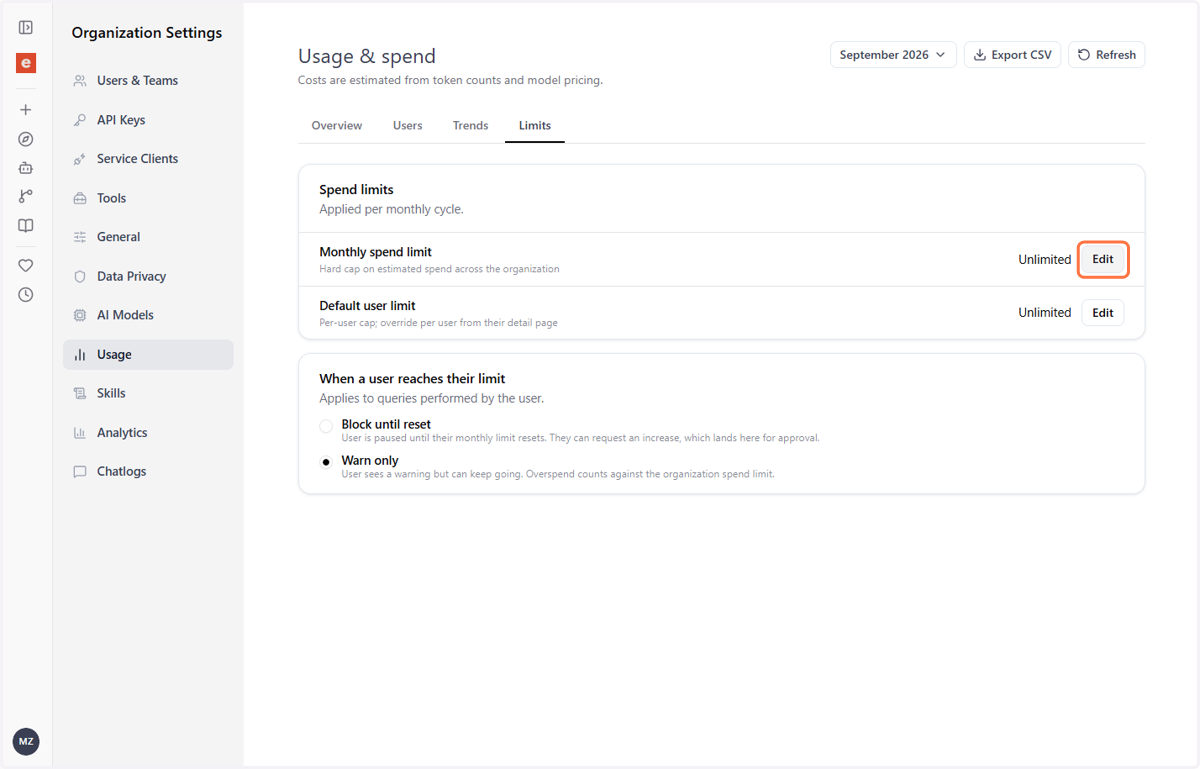
On the Spend limits card, next to Monthly spend limit, click Edit.
Click on Edit
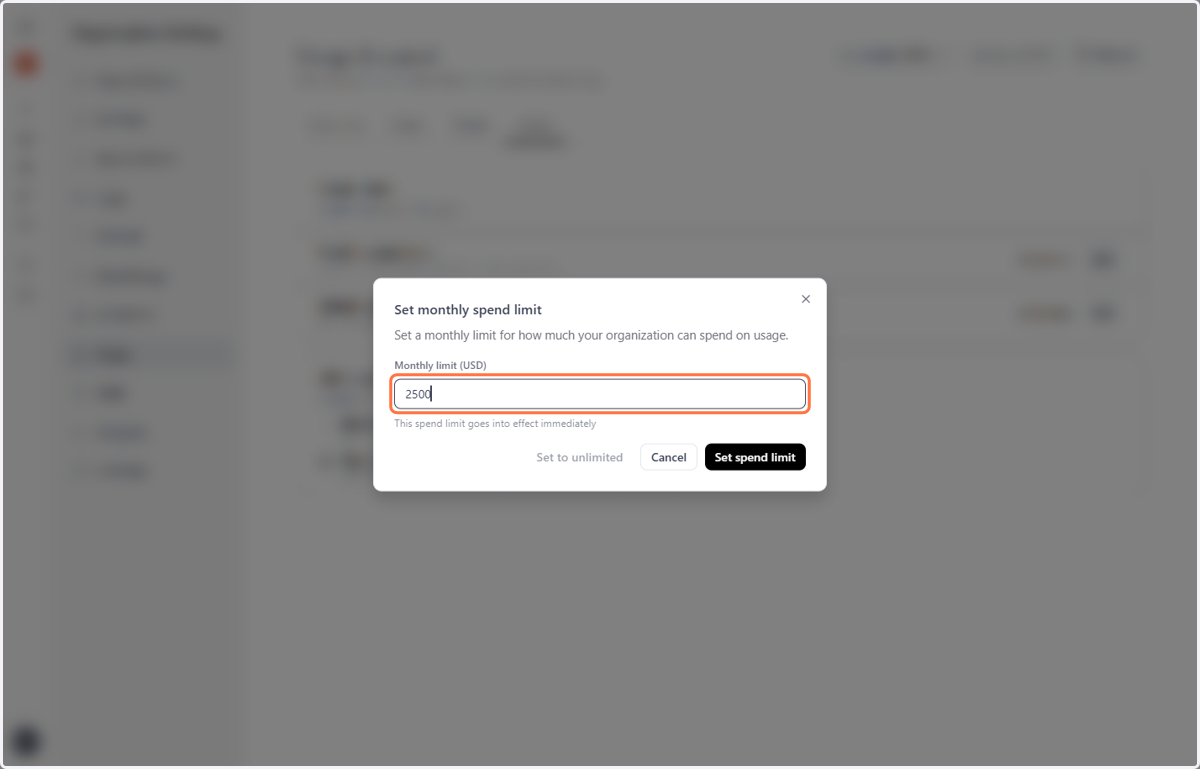
Enter the amount in Monthly limit (USD) and click Set spend limit.
Type Monthly limit (USD)
Set this even if you intend to give everyone a per-user limit. It is a hard cap on estimated spend across the organization, and it is the only limit that stops everyone: per-user limits divide the budget up, but they do not cap the total.
To remove the cap, use Set to unlimited rather than clearing the field. Unlimited is shown in the row when no cap is in force.

4. Set the default user limit#

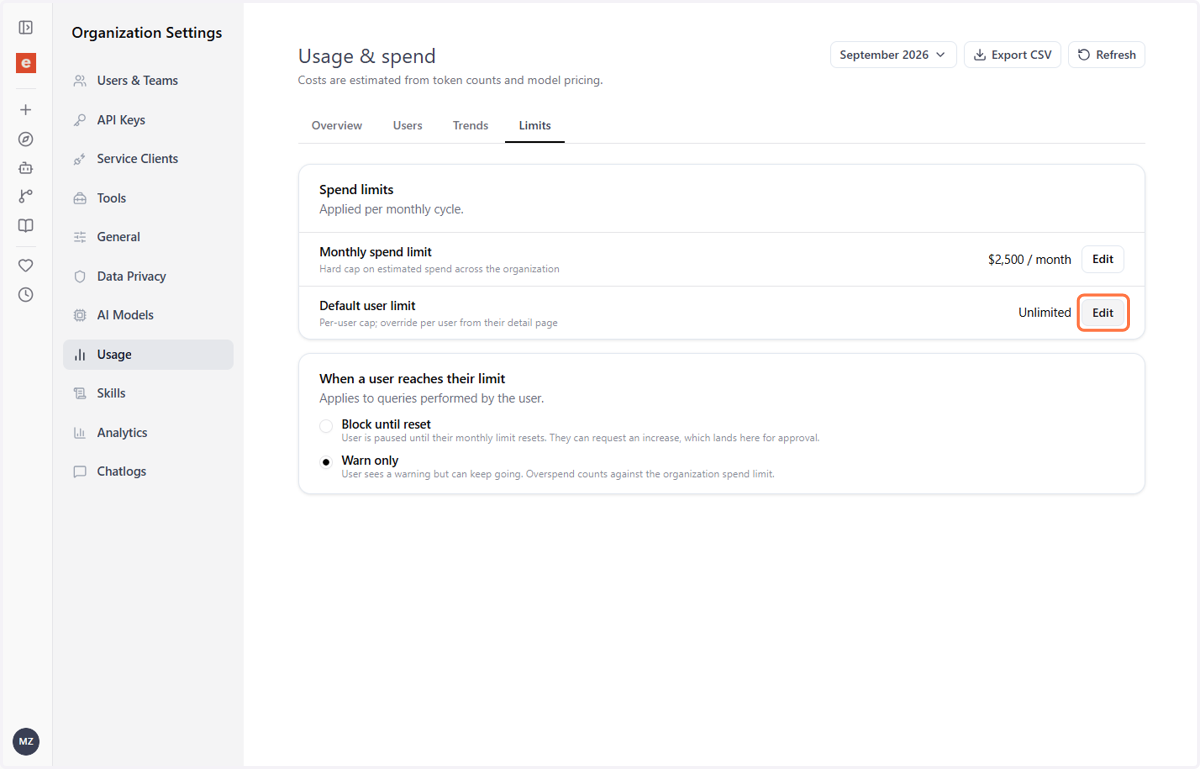
Still on Spend limits, click Edit next to Default user limit.
Click on Edit
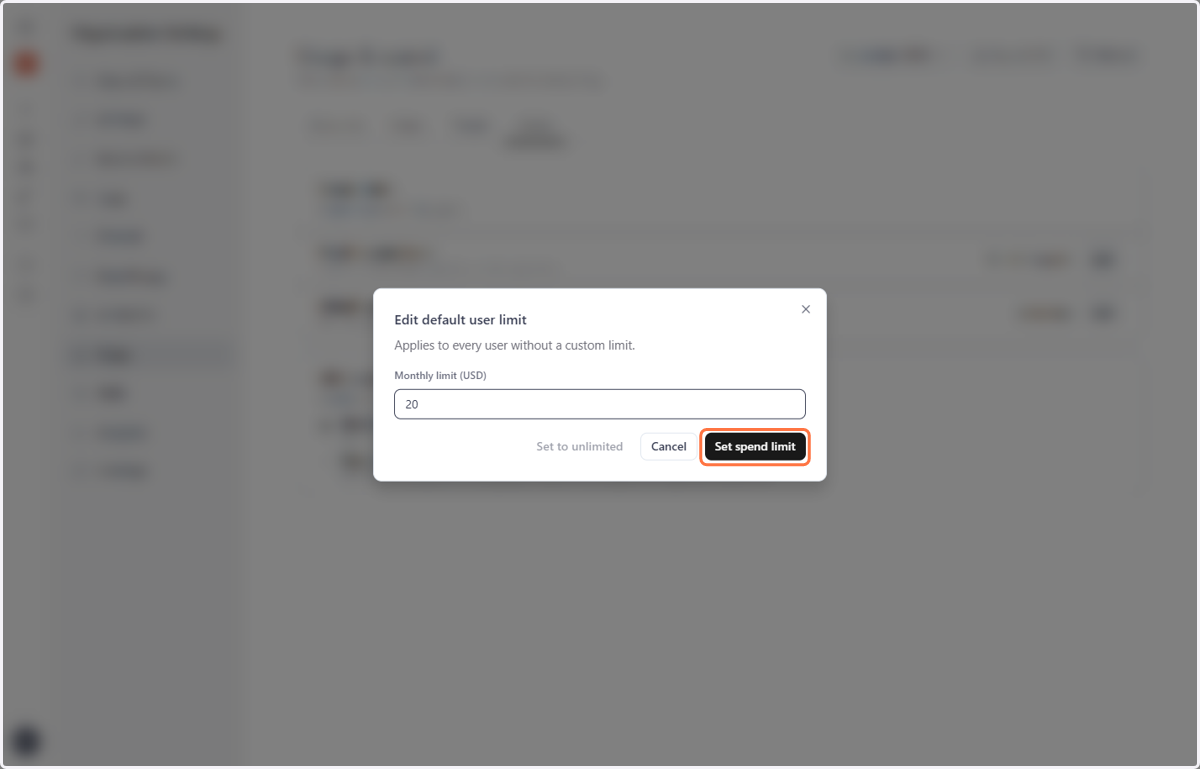
This one applies to every user without a custom limit, so in most organizations it is the limit that governs almost everybody. Setting a sensible default here is far less work than granting people individual limits one at a time, and far easier to change later.
Click on Set spend limit
Once both are set, the card shows the amounts in place of Unlimited

5. Give an individual user their own limit#

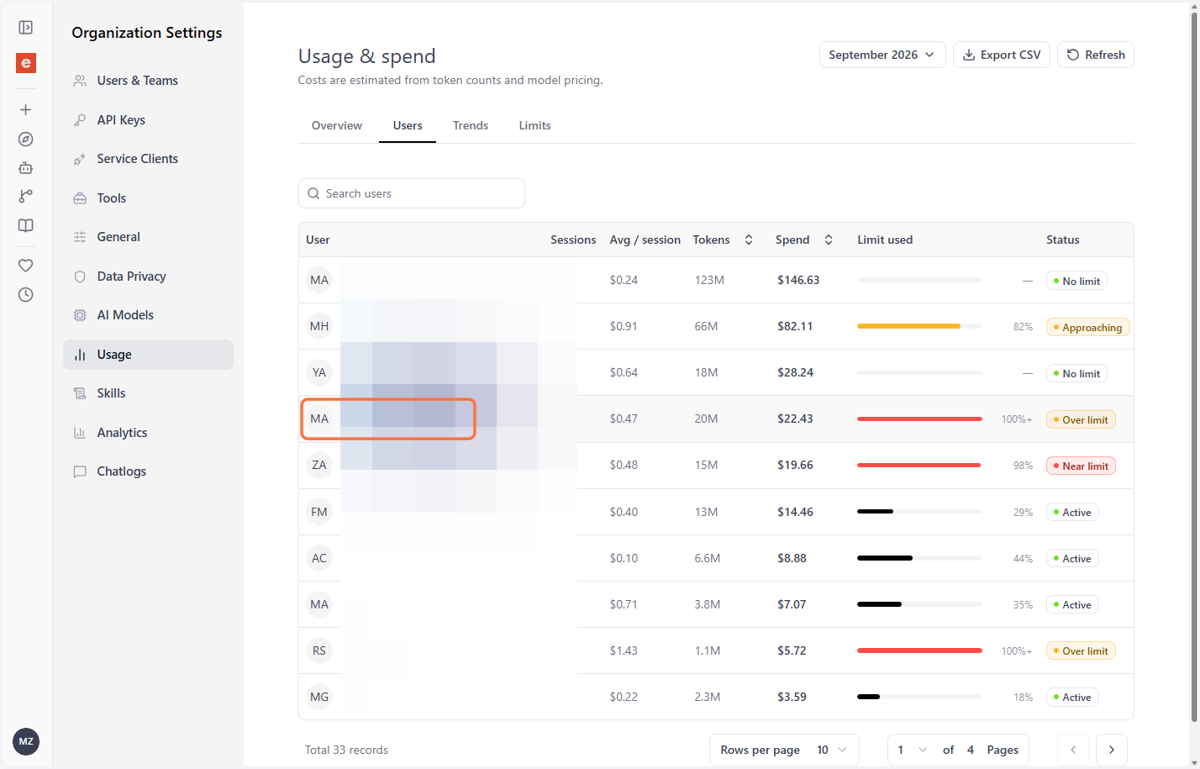
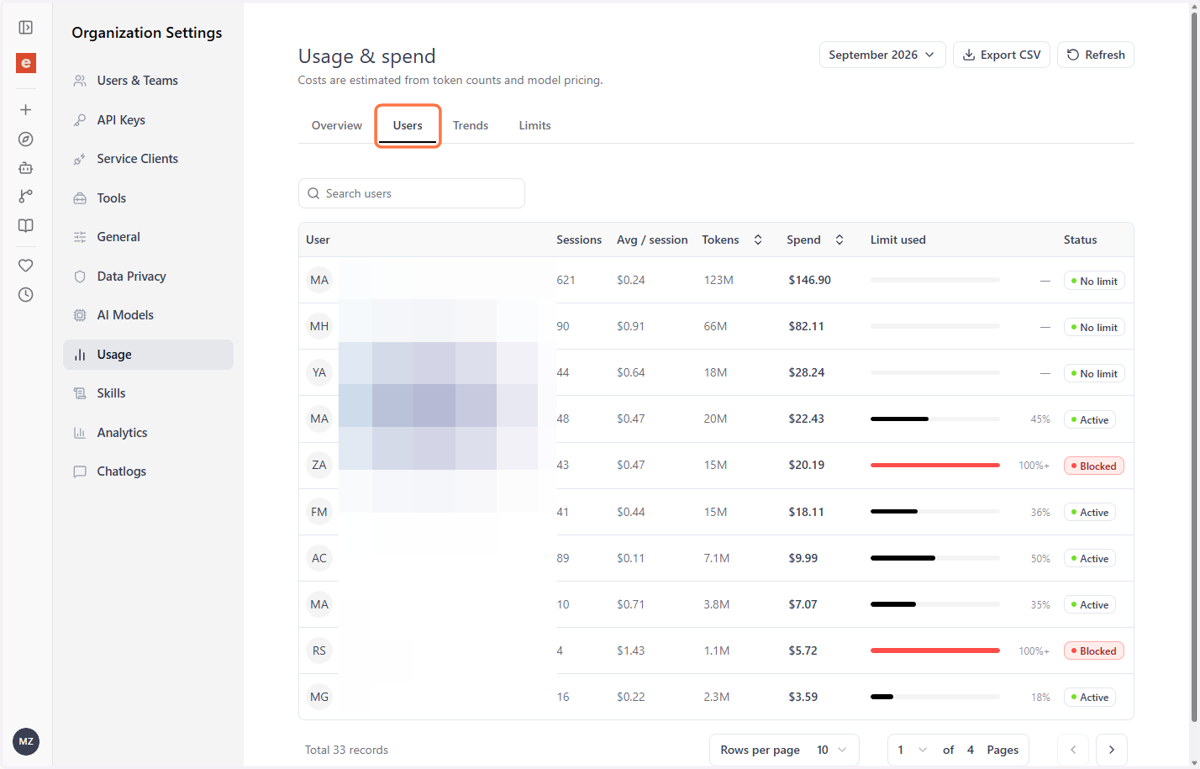
Per-user limits are not set on this Limits tab. Open the Users tab, which lists everyone with their sessions, tokens, spend, how much of their limit is used, and their status.
Click on Muhammad Abdul Baqi…
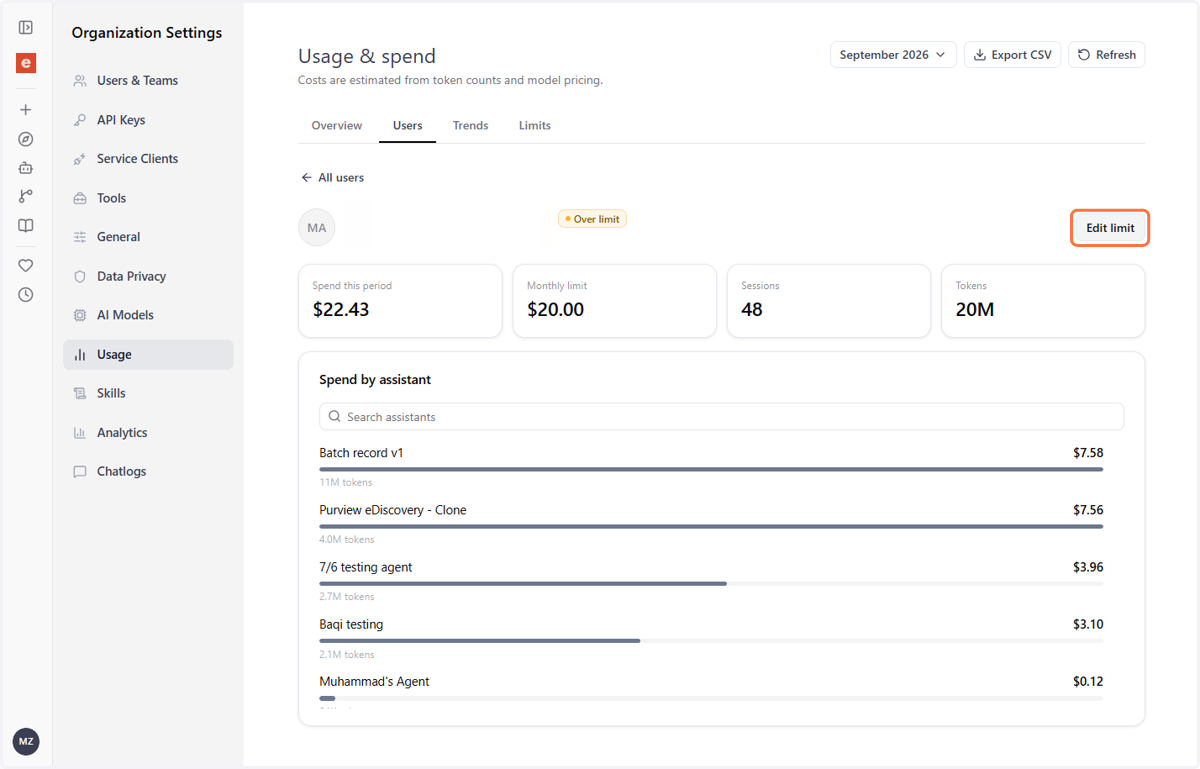
Click the user's name to open their detail page, then click Edit limit.
Click on Edit limit
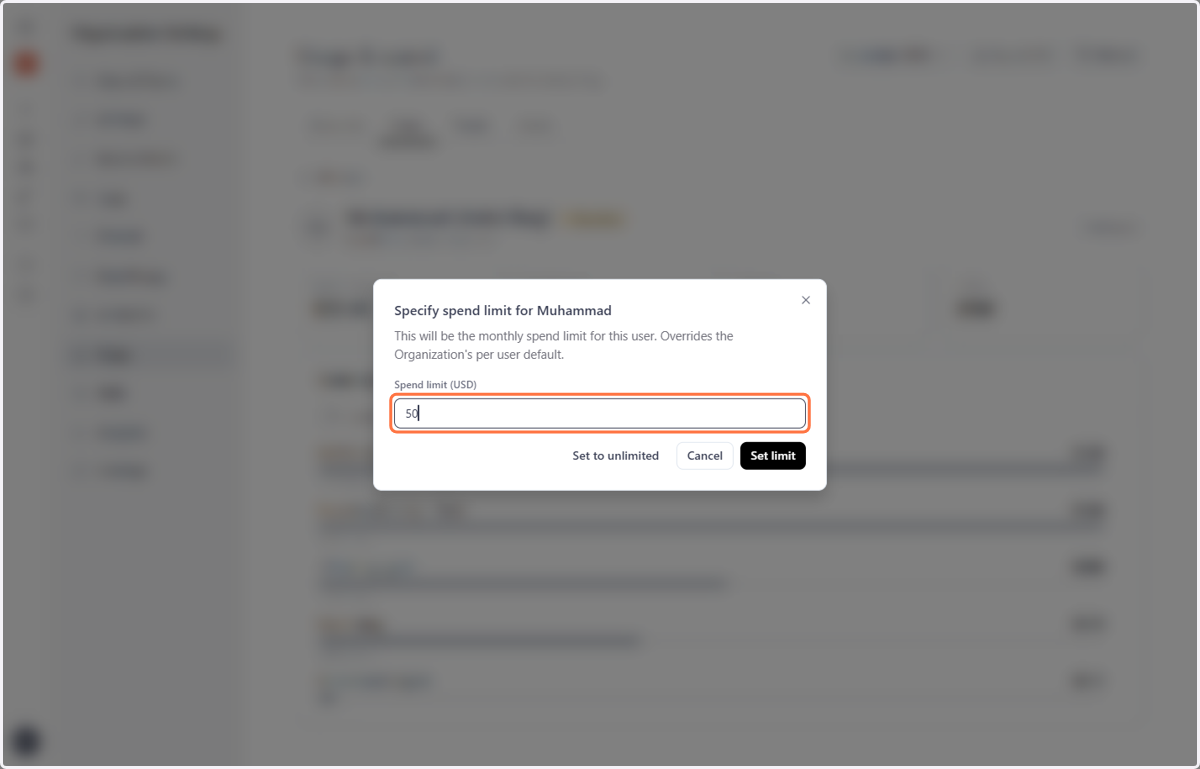
Enter the amount in Spend limit (USD) and click Set limit. This overrides the organization's per-user default for that person only.
Type Spend limit (USD)
Give a per-user limit only to the people who genuinely differ from the baseline, a power user who needs more, a contractor who needs less.
Using Set to unlimited here creates a personal limit that happens to be unlimited, and it still overrides the default. If what you want is to put someone back on the default, remove their personal limit.
The monthly spend limit still applies. A user set to unlimited is not exempt from it, they stop with everyone else when the organization reaches its total.

6. Choose what happens when a user reaches their limit#

On the When a user reaches their limit card, pick one of the two options. It applies to queries performed by the user.
OptionWhat the user experiences
Block until resetThe user is paused until their monthly limit resets. They can request an increase, which lands on this tab for approval.
Warn onlyThe user sees a warning but can keep going. Overspend still counts against the organization spend limit.
A. Click on Limits B. Select an option C. Select an option
This choice governs a user's own limit only. The monthly spend limit is a hard cap either way.
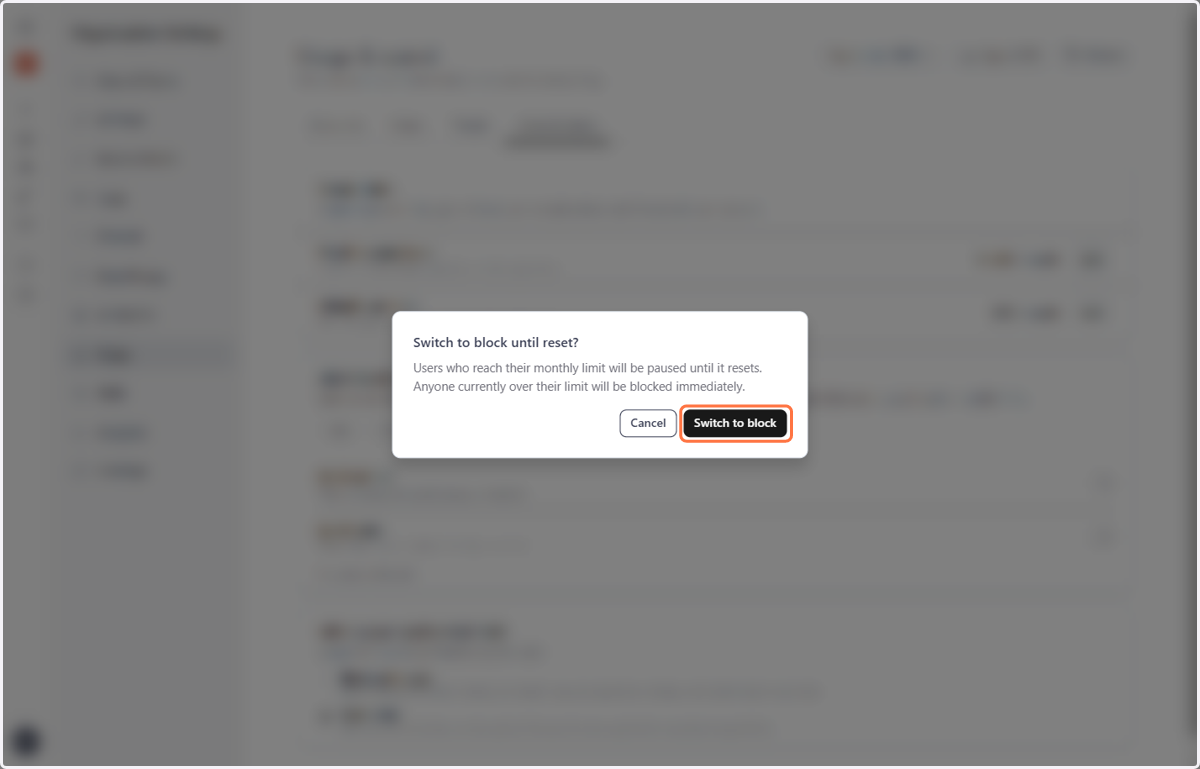
For this guide we will switch to Block until reset
Click on Switch to block

7. Check the result on the Users tab#

Go back to Users and read the Limit used and Status columns.
StatusMeaning
ActiveLimit is in effect and yet to be reached.
ApproachingSpend is Approaching the limit.
BlockedSpend has reached a limit that is being enforced.
No limitThe user has Unlimited set as Limit.
Click on Users
If somebody is already over the limit you just set, they will show as blocked straight away. That is expected, the limit is compared against the spend already recorded this month, not only against spend from here on.

8. Decide a limit increase request#

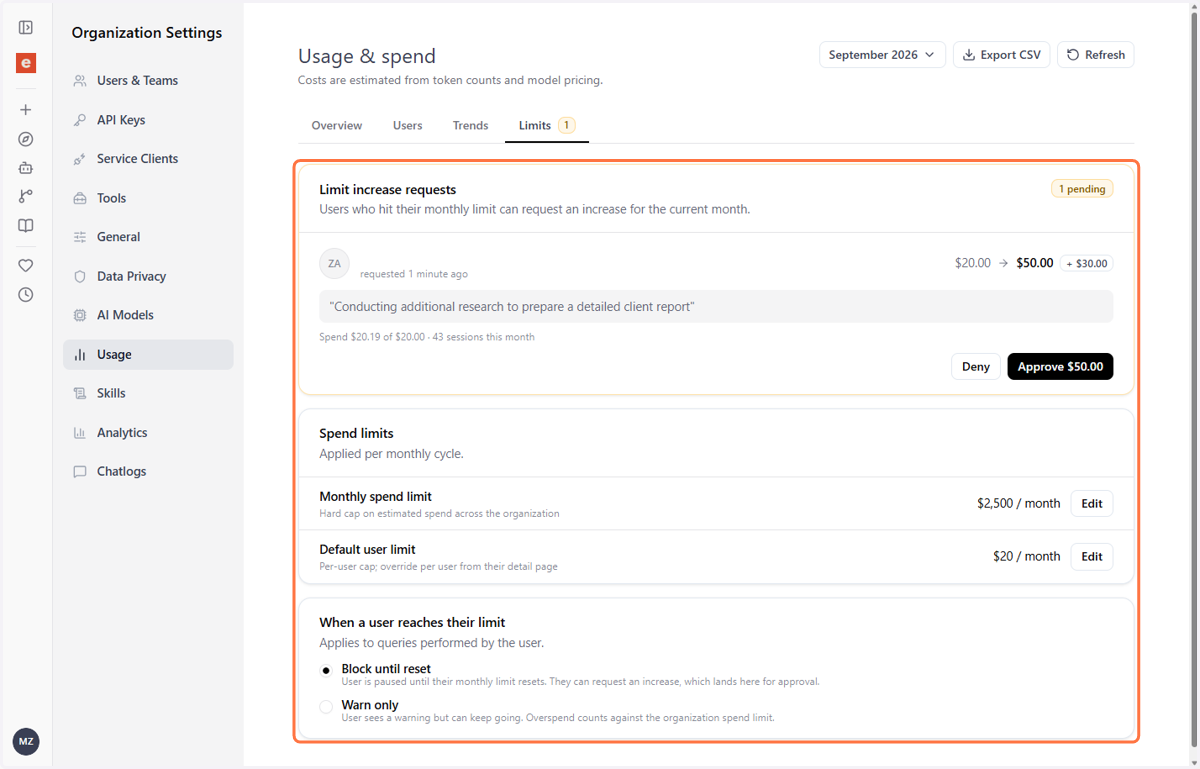
When a user who has hit their limit asks for more, the Limits tab gains a count badge and a Limit increase requests card appears at the top.
Click on Limits
Each request shows who filed it and when, the change being asked for ($20.00 → $50.00, with the difference beside it), the note they wrote, and their spend and session count for the month, so you can decide without leaving the tab.
Click Deny, or Approve for the amount shown.
An approval replaces the ceiling, it does not add to it. A user on a $50 limit approved for $65 has a $65 limit for the month, not $115.
And it expires at the reset. The grant applies for the rest of this month only; next month the user falls back to their standing limit. If the raise should be permanent, set their per-user limit as in step 5.

Best practices#

Set budgets from the dashboard, not from estimates. The Overview and Users tabs show what your organization is actually spending. Work from those figures, and revise them as the picture changes, a limit can be edited at any time.
Always set the monthly spend limit. It is the only hard cap. Per-user limits divide the budget between people; they do not stop the total from growing.
Prefer the default over many per-user limits. One default plus a handful of deliberate exceptions is easier to reason about, and far easier to change, than dozens of individual limits.
Use increase requests for one-off overruns, per-user limits for permanent ones. An approved increase disappears at the month reset by design. If you find yourself approving the same person every month, raise their standing limit instead.

Troubleshooting#

SymptomLikely causeWhat to do
Nobody is ever paused although spend is over the limit.Warn only is selected on the When a user reaches their limit card, which warns and lets people carry on.Choose Block until reset if the limit needs to be held.
A user set to unlimited is blocked anyway.The monthly spend limit was reached. It is a hard cap, and no per-user limit exempts anyone from it.Raise the monthly spend limit, or wait for the month reset.
A user is still blocked after you raised their limit.Their spend for the month is at or above the new limit too.Raise it further, approve an increase request, or wait for the reset.
A user can't file an increase request.They already have one pending this month.Decide their open request.
An approved increase vanished.Grants apply only for the month they were granted in.Set that user's per-user limit for a permanent raise.
Previous
Overview